CHAPTER 11
FORMULARY SUBSTRATES AND VARNISHES
here formulary of substrates compositions applied to diferent materials like glass, tiles, metal and plastics before
coating with silver gelatine photographic emulsions to secure good adhesion. also sepia toner to change image color.
varnishes to protect silver images and many other processing baths for silver prints.

make photo paper and To Prepare Different other Materials Before Coating with Liquid Emulsion Use subbing layer
compositions or substrates below.
What is a subbing layer or substrate?
It is a pre coat given to the material prior to coating with the liquid photo emulsion . -Why is a pre coat or subbing
layer needed ? -for 3 main reasons as follows:
1) to isolate the emulsion from chemically reactive materials
which may cause fog or stains on storage.
2) To secure good adhesion of the gelatin emulsion to the material.
3) to cover the color of the material as in the case of WHITE PRIMER given in one of the
compositions in the Formulary below.
4) In some cases the sub, pre-coat, or under layer, does all 3 functions mentioned above.
All the compositions Below have been worked out at my CAFEGRAFIA Labs and have been in use
for more than 20 years. They work. Each composition can be used all by itself or in combination with one and the other to
meet any challenge and requirements for coating emulsions on any material. Compositions with gelatine; to keep indefinitely
without refrigeration: "must have at least: 30% alcohol". The ones
containing gelatin, because they coagulate in standing, have to be melted in a hot water bath (35-45c) before use.
TO MAKE THE COMPOSITIONS
soak the gelatin (any type but "colorless and flavorless") in the solvents at room temperature for about 30
minutes. (due to alcohol absorption is much prolonged) Agitate occasionally before Melting it in hot water bath and
agitate until all ingredients are mixed entirely. In the case where corn
starch is used, it will sediment at bottom of vessel on standing. Agitate to re-suspend it every time before
use. Do the same with the white primer.
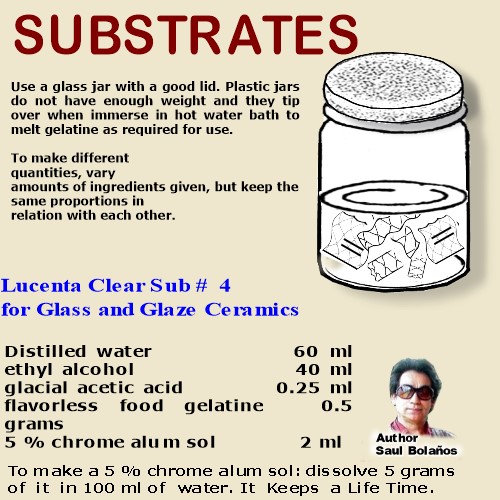 Use a glass jar with a good lid.
Plastic jars do not have enough weight and they tip over when immerse in hot water bath to melt gelatine as required for use.
To make different quantities, vary amounts of ingredients given,
but keep the same proportions in
relation with each other.
CLEAR SUB # 1
use for fiber paper, wood , porous materials and plastics sanded with steel wool . Color and texture of material will be seen through.
water............................................................140 ml
ethyl alcohol ..................................................60 ml
potassium alum 5% solution...................... 10 ml
glacial acetic acid............................................ 1 ml
flavorless and colorless food gelatin........... 5 grams
ordinary corn starch powder........................10 grams
keeps indefinitely without refrigeration
CLEAR SUB # 2
FOR GLASS AND GLAZED CERAMICS
PART : A water............................................140 ml
ethyl alcohol ...................................................60 ml
potassium alum 5 % solution....................... 10 ml
glacial acetic acid............................................ 1 ml
flavorless and colorless (any ) gelatin.......... 5 grams
PART: B Flat Light Beer
Use:
Mix Before use, PART A: ............. .....4 parts
PART:B .....................................................1 part
Keeps indefinitely at room temp. Mixed sub can be used over & over again but only keeps a few days Due to the Beer it spreads easier than sub # 4
CLEAR SUB # 3
For Metals, Glass and special Applications.
color and texture of material will be seen through.Sodium Metasilicate.................................. 1 gram
distilled water............................................ 100 ml
at Room Temp solution keeps 3 - 5 years
 EXAMPLE1
Suppose a white plastic spoon must be coated with emulsion. Sand first with fine steel wool Brush or dip in clear
sub #1. Dry. Apply another coat of sub #1. Dry and coat with emulsion. The role of the
starch is multifunctional as follows:
1. It serves as a tooth on which emulsion anchors better.
2. As an opacifier or antihalo. During enlarging, projected images from a negative onto a clear
or translucent surface such as white plastics or “porcelain” ceramic plates; are not too sharp because the light image goes
all the way through the material.
Starch stops its total infiltration and provides a superficial focal plane resulting in
increased sharpness. (for such purpose starch can also be added to emulsion itself)
3. Allows image to take pencils or watercolor, Just as if it was done on paper.
Clear Sub # 4 for Glass and Glaze Ceramics
FORMULA
Distilled water 60 ml
ethyl alcohol 40 ml
glacial acetic acid 0.25 ml
flavorless food gelatine 0.5 grams
5 % chrome alum solution 2 ml
 To make a 5 % chrome alum sol:
dissolve 5 grams of it in 100 ml of water.
It Keeps a Life Time. Chrome alum is a gelatine hardener that makes emulsion stick to glass, preventing damage during
processing. the formula above is unrivalled for the purpose and keeps a lifetime. Chrome alum is not at this time listed as
particularly toxic, but handle with discretion. If in leaf form cut gelatine in small pieces. Place with rest of mixture
inside a glass jar with lid. Leave soaking for 30 min, melt in a water bath at 50 c, for 15 - 30 min.
Stir occasionally until completely dissolved. Filter through paper, Use top part of solution if solids sediment over the
years. For larger quantities keep same proportions of ingredients
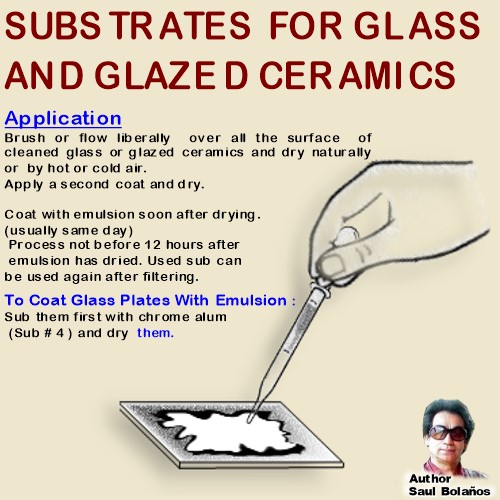
Application
This sub does not spread as easy as sub # 2. By normal room lights of course,
Brush or flow liberally over all the surface of cleaned glass or glazed ceramics and dry naturally or by hot or cold air.
Apply a second coat and dry. It does not matters much if sub is left perfectly even on material.
Emulsion on running over it absorbs it into its body. Coat with emulsion soon after drying.( usually same day) Process not before 12 hours after emulsion has dried. Used sub can be used again after filtering.
Sub them first with chrome alum (Sub # 4 above) and dry them. Next, perfectly level a large glass plate on a table using a spirit leveler. Place the glass plates to be coated there on. Flow the right quantity of liquid emulsion per surface area melted at 35c on the center of plate and spread the pool evenly to all four corners with your fingers or a plastic ruler and leave them in the dark for 10-15 minutes until emulsion sets into a immobile solid, then it can be stood up to dry in front of the cold air from a fan.
In cold climate (20 c / 68 f or under) the plates may have to be pre-heated to body temperature ( 40-45
c / 104 -113 f ) just before coating to prevent emulsion from setting into a solid prematurely. Tiles and flat planed pieces can be coated in the same way. Plates and all irregularly shaped objects
are best coated with a brush. ( See Coating 35mm Glass Plates )
 WHITE PRIMER
Sub # 5
Use this sub to fill porous material and to impart a white ground to dark color porous material. On this “white paint” sub,
“unwashed” silver chloride or chlorobromide emulsion can be coated, and the nitrates will sink into the pores, emulsion
then will not feel sticky on drying. This primer adheres well to many materials. (on plastic: sand it first)
water.......................................................140 ml
ethyl alcohol..............................................60 ml
glycerin....................................................10 ml
white powder calcium carbonate (chalk)....80 grams
flavorless and colorless gelatin............ 20 grams
Keeps indefinitely, but it must be well capped, Escape of solvent s results in thickening. Dilute with
equal parts of alcohol and water if necessary.
Subbing Materials with Sub # 5
Use this primer when a “white ground” is wanted for maximum sharpness and image contrast and to “fill” very porous
materials like coffee filter paper, plain cloth, plain wood, stones, (it uses chalk instead of Barium Sulphate ) Also to
paint with a “white” ground “Dark Color” materials like black stones, dark paper, dark ceramics, dark color wood. etc.
Apply 1 - 4 coats until pores are totally filled or as in the case of a dark ground until it has been covered
white. Dry before applying each successive coat. Coat with the silver emulsion, dry and process. Brush the white
primer on both sides of the material if necessary (for example on super absorbent coffee filter paper.) The proportions
Chalk to Gel (1:4) do not impart maximum covering power, but it has great flexibility on all materials. On paper the
coated
primer is elastic, it can be bent without craking. it is permanent.
“Canvas “ Primer Sub # 6
Use to Make Emulsion Adhere to “Acrylic” or “Oil” Primed Commercial Artists Canvas
water............................................50 ML
Isopropyl ( rubbing alcohol) .... 50 ML
flavorless and colorless gelatin.......5 grams
Keeps indefinitely.
Inside a glass jar, Soak gel in the mixture until it absorbs the alcoholat least 30 min. Melt in hot water bath, as
indicated earlier for other subs. Brush coat canvas with this substrate twice, and dry each time, Finally coat with
emulsion.
Mixture keeps like all other formulas given above, indefinitely. If necessary to thin down for coating of large areas, do
it with equal parts of isopropyl alcohol and water. The isopropyl is a solvent for “ acrylic” resins, and “softens” “Oil”
primers. this is the reason why sub adheres to “acrylic” or “Oiled:“ Primed Commercial Canvas, Isopropyl can not be
substituted by Ethyl alcohol. Instead of Isopropyl, Acetone can be used.
HOW TO COAT BARE METAL WITH EMULSION
 color and texture of
metal
color and texture of
metal
will be seen through
1. Brush the bare, clean, metal's surface thinly and
evenly with CLEAR SUB # 3 and
Dry.
2. Now brush on top of the first coat quickly with only
one pass of the brush charged with:
CLEAR SUB # 2 (part A only)
The reason the metal should be brushed quickly with clear sub # 2 with
only one pass of the brush,
is to avoid erasing the sub # 3 applied first. Erasing of this first sub will occur if the brush (charged with sub # 2 )
persists for too long on the same area of application.
Once the first coat of # 2, has dried, now you can apply the second coat of clear sub # 2, This time thicker and with
less danger of erasing sub # 3.
Failure of utterly covering the metal with clear sub # 2 will result in black spots caused either by the emulsion
chemically reacting with the metal or by the sodium thiosulphate ( in the fixer solution ) attacking the metal.
FACTS:
Without sub # 3, Clear sub # 2 will not adhere to the metal. if emulsions floats off the metal during development, sub # 3
was not well applied or was left too thin.
Remedy: try again and apply 2 coats of sub # 3. do this by applying the second coat only after
the first has dried. Apply finally the 2 coats of clear sub # 2 on top of the dried # 3 . as described earlier.
PROBLEMS: “Frilling” emulsion coming off its support during processing, can often be
remedied by using Boric Aluminum Hardening Stop Bath. (see Silver Chloride Emulsion Chapter)
When Wanted to Hide the Color of the Metal:
1. Coat the bare metal first with: CLEAR SUB # 3
2. Dry and coat with: CLEAR SUB # 2
3. Dry and coat with: WHITE PRIMER. Sub # 5
4. and finally with Emulsion.
Other Options: Clear Varnishes or opaque paints
EXAMPLE 1
1. Wash, Clean metal well , dry it.
2. Now Spray coated it with a “clear” ( colorless ) varnish. either “oil ” base or “alkyd
” resin based. Use a “ Clear ” Varnish if color of metal must show under silver image. Or “opaque ” paint of any light
color, when the metal is either too dark or just meant to be the substrate of the image. Coat even & “ thin ”
3. After spraying, Leave 48 hours hanging in open air to ventilate so excess of paint or
varnish gases escape. Coat at the end of that time with emulsion.
-Note A. If coated immediately or too soon, emulsion will not adhere and also the gases
will fog it.
-Note: B. If coated with emulsion about 4 - 8 weeks after spray coating has dried; Gases
will have all escaped, Coated emulsion will not fog but it will not adhere unless it is sanded with fine steel wool before
coating, or subbed with sub # 2 or # 4.
4. 48 hours ( not before) After sprayed on clear film or paint has dried on the material
, wash lightly with soap and water, rinse well, dry.
5. Coat with emulsion.
6. process coated material before 2 weeks after coating. If stored too long before
processing, in about 1 - 3 months, Varnish gases remaining in the sprayed film or paint will produce a light orange or gray
fog.
-Note C. If coated with emulsion 4 - 8 weeks after spray coating has dried; (instead of
the normal 48 - 72 hours) Most Gases will have escaped, and Coated emulsion will not fog so easy on storage. But as said
earlier, in such case the material must be subbed to secure emulsion adherence.
 EXAMPLE 2
Instead of Metal, Any other Material, like wood, stones, sea shells, glass, plastic objects, etc. Can be subbed with
“alkyd” or “oil base” paints or clear varnishes prior to coating with emulsion, and treated as given in EXAMPLE 1.
Instead of “alkyd” or “oil” base varnishes
, “acrylic” or any other type of synthetic resin can be used but the materials must be
lightly (fine wool) sanded first and treated as given for coating plastics. The advantage of synthetic resins over the
organic first mentioned ( oil & alkyd ) is that the finished applied coat does not normally yellows with time, and
solvents escape much faster giving a much longer shelf life to the coated material.
Applied “oil or alkyd “ Base Coatings
(clear or pigmented) coatings tend to develop a slight very pale cream color which is very nice and artistic especially on
sepia toned silver images. This yellowing or antique look, occurs rapidly if finished coating is exposed to strong light
and air. (from 2-8 weeks) Then it reaches a maximum as aging color stabilizes.
have the advantage that they anchor the emulsion well and as oil and alkyd base varnishes; they adhere to any material (plastics / metal / etc ) and do not need a sub. But they are to be avoided, and should not be applied over materials of a “white” color because they develop an age color overtime that is too strong, instead of a light cream color, they invariably furnish a very objectionable dark orange, particularly if coating is left too thick.
Clear (colorless) polyurethane varnish may be used with advantage however on light color metals like aluminum, where the age developed orange will make it look good as if the metal was gold or light color bronze or brass. On “natural” ( not painted ) wood they also look good, it imparts to it a very warm vintage look ( as do also “oil & alkyd” clear varnishes) Follow Coating and Storage Precautions already given, in EXAMPLE 1.
Sand Plastics with fine steel wool any material ( including wood) sprayed with acrylic or synthetic paint or varnish is treated here as a plastic object. Absolutely important for emulsion adherence on “bare plastics” that is, for plastics as they come in commerce and not coated with varnishes or paints; is to Matt the plastic first by sanding it with fine steel wool.
Sand the surface utterly and entirely. sanding left to right, then top to bottom and finally diagonally.
For color and texture of material to be seen through: after sanding, coat plastic with one or two coats of CLEAR SUB # 1
(wait before first coat has dried before applying the second ) After drying, coat with silver emulsion. Process preferably
24 hours after emulsion has dried on the coated material.
If for any reason it is wanted to hide the color of the plastic, after sanding with steel wool, cover with:
1. CLEAR SUB # 1
2. Dry and coat with: WHITE PRIMER.
3. Dry, and coat with: liquid silver emulsion.
One of the great advantages of subbing with all the subs given, is that the coated emulsion has a very long shelf life
without fog before processing, as compared with material subbed with “oil base” or “alkyd base” paints or lacquers.
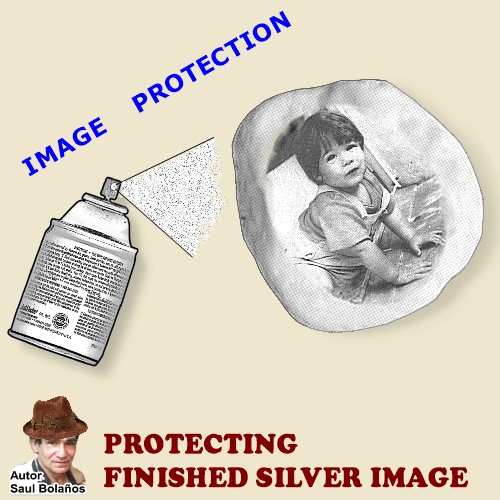 IMAGE PROTECTION Protective varnishes
Finished images on paper or any other flat substrates that can be framed and kept under glass do not need any protection
from humidity or atmospheric contaminants.
Pictures on plates, stones, eggs. etc that due to their shapes can not be kept under glass and must be exhibited “indoors”
exposed to humidity, and cleaned ( with humid soft sponge) occasionally; -Do require a protective overcoat of some
sort.
This coat or varnish must be waterproof and preferably a colorless type that will not yellow with time. For this reason
polyurethane, “alkyd & oil base“ and any other type of “organic” gums and resins should be avoided.
Acrylic, or other type of synthetic “ colorless” plastic coats should be
used, These do not yellow with time. they can be sprayed in thin uniform layers, over the finished piece.
But to secure adherence to the gelatin in which the silver image is embedded, At my labs I worked out the following process
which is entirely satisfactory. Better than any other process ever published. IMPORTANT:
Before applying the varnish, in Step 3, dehydrate excessive humidity off the image or its
substrate by applying hot air on the piece. Stones primed with several coats of White Primer (sub # 5) for example, Even if
the image on the stone “feels” dry to the touch.
It retains great amounts of humidity because the white priming coat under it is left necessarily very thick. Failing to do
so, will result in the applied lacquer or varnish loosing its gloss after a few days. This occurs due to the residual
“humidity” left on sub rising to the top, where it will combine with the plastic coat.
The remedy is to dehydrate completely and apply another coat of lacquer. But this should be avoided in the first place.
Before Spray Varnishing Image Follow these Steps:
1. Brush
the dry image with clear sub # 1.
Leave sub thick enough over the image so
it will protect it for next step. After drying:
2. Sand image very lightly with fine steel wool,
with care not to penetrate too deep into the layer
erasing image details. Any matting or loss of gloss over image, will be recovered when image is “wetted” with the varnish.
This “ light sanding ” assures good adhesion of the hydrophobic acrylic varnish to the gelatine.
3. Spray image with the Acrylic lacquer, thinly and evenly. with 2 - 3 light passes instead of
a single thick and uneven one. Finished Protected image kept “indoors” can be cleaned occasionally over the years with a
humid soft sponge , drying immediately afterwards as not leave calcium deposits (if tap water)
Protective Varnishes For Exteriors
Follow steps 1 to 3, as
already given above, but instead of using an acrylic varnish, try an “Epoxy“ type of plastic, these may come in two parts:
A & B. which are mixed before use. Clear “Fiber glass” types of coatings may be used. What is important is to choose a
type that will not “yellow” with age. Polyurethane may be used if yellowing matter not.
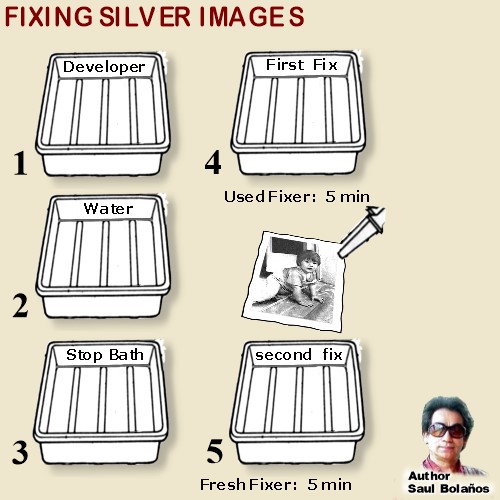 F i x i n
g
F i x i n
g
The best fixing bath is a plain 20 % sodium thiosulphate (sodium hyposulphite) All additions impairing instead of enhancing
its performance. Acids will precipitate the Sulphur sooner or later, mineral acids will do it almost instantly.
This principle is used in the Direct Sepia Toning Baths. Organic acids are not so rapid (except tartaric) but sooner or
later they will precipitate the Sulphur also.
Potassium Alum
Necessarily a hardening agent
like potassium alum must be added to the bath to prevent damage to the soft gelatine layer during washing.
Chrome alum
is a more efficient hardener, It was in common
use before 1940, but it is too unstable, -its hardening life is too short, 24-48 hours. Even in “hardening” stop baths (without the presence of thiosulphate) the performance of Chrome Alum is
erratic.
The Boric aluminium hardening stop bath that I worked out, is infinitely superior in this and all respects. Boric Acid the Fixing Bath must be made acid to retard the precipitation of the aluminum in the form
of a white sludge of aluminium hydroxide.
(present in the hardener: in the potassium aluminium) the best acid for the purpose is Boric
acid which at the same time prolongs the “hardening life” of the bath by at least 300 %.
It performs better and is easier to obtain than potassium metabisulphite; the only other acid appropriate for the same
purpose.
Sulphite
The presence of Sulphite is not absolutely
necessary (if it is not available) but it is desirable because it retards the decomposition of the Sodium thiosulphate by
the Boric acid.
Acetic Acid in the F 5 Hardening Bath The glacial acetic acid, is desirable but not
absolutely necessary, it neutralizes the excess of alkali carried over from the developer bath, helping to prevent yellow
developer stains, in this respect it assists the boric acid which also works in the same direction.
But the primary function of the acetic acid is to lower the PH to about 4.0, at which the maximum hardening power of the
potassium alum is effected.
With this low PH, a relatively low alum concentration as given (1.5 % ) is sufficient to harden the gelatine very well. It
increases the hardening power greatly. A 5 % pot alum concentration at the given ph, would raise the melting point of the
gelatine way above + 20 degrees Celsius, But it is not necessary, Silver Thiosulphate soluble double salts of sulphur and
sodium ( formed during fixing) will take longer to wash out from an over harden gelatin layer than from a moderately but
sufficiently hardened one as with 1.5 % pot alum at the given PH.
Fading of Images:
Incomplete fixing in the number 1 cause of fading.
and the number 2 cause of stains. Sparing of the fixer solution is the most frequent Fatal mistake made. A Fixing bath
which has been used once For Fixing, contains Silver - Hypo compounds and can not Fix Perfectly.
Fixing is the act of removing soluble silver compounds from the gelatine layer, and this
can only be accomplished by a fresh unused fixer bath. A two bath fixing method should be
employed. For archival permanency the last or second bath should always be used fresh. After fixing in the fresh
bath, this “used no longer fresh bath” should now become the first bath in the subsequent fixing of prints. F5 is a Good
Bath.
F 5 Hardening Fixing Bath
Mix in the order given
Water at around 50 - 60 c (125 f +).... 600 ml
Sodium Thiosulphate (Hypo) ....240 gms
Sodium Sulphite (anhydrous) ....15gms
Acetic Acid ( glacial = about 90 % +) ....13 ml
(or 28 % made by diluting glacial 3:8) ....235 ml
Boric Acid (crystals) ....7.5 gms
Potassium Alum ....15 gms
Add cold water to a final Volume of ....1000 ml
Note: for dissolving the Boric acid Follow direction given for the Bor Alum
Hardening Stop Bath in the “Silver Chloride Emulsion Chapter “
Capacity:
Hand Coated Materials are always Left with
uneven emulsion Layers. Negative emulsion; high Silver content:
100 ml fixes: 1 glass plate size: 8 x 10 inches.
Positive Papers =Lower Ag content:
100 ml of ""F 5" Fixes up to: 2 - 8 x 10 in.
sheets.
Processing:
1. Develop 2. Rinse in Water 3. Stop in Acid Bath 4. First Fixer.
5. Second Fresh Fixer.
How To Prepare a 30 %
Solution of Sodium Thiosulphate
I worked out the following procedure at my Labs to rapidly make a 30 % Sodium Thiosulphate solution for the purpose of
fixing paper and films. This can be prepared easily in about 2 hours. What is needed:
1. a Large Metal pot, preferably 3 - 4 liters
volume.
2. Sodium Sulphite anhydrous. If in doubt as to what
type of sulphite you have, just simply heat it in the open air inside a pan at over 100c, until it gives up no water vapor
as it looses all its water and becomes “Anhydrous.”
3. Flowers of Sulphur, this is how Sulphur occurs in its
native form. Is the purest commercial Sulphur available. Lemon- yellow soft stones that must be powdered somewhat for
faster dissolution. It is insoluble in water, but the Sodium Sulphite will absorb it after a while when held at boiling
point.
Formula:
Sodium Sulphite Anhydrous 150 grams
Powdered Flowers of Sulphur 25 grams
Water .................................. 1000 ml
Operation must be conducted in the open air, far away from photographic material, the sulphurous gases evolved are of
course not deadly but are not healthy. either. Add the Sulphur and the Sulphite to the water at boiling point, and mix
thoroughly with a wire beater. Keep the Lid on pot at all times to avoid escape of too much water, Keep at boiling point
for about 1 hour, stirring occasionally every 15 minutes to speed up the reaction. In about 2 hours at boiling point, most
of the Sulphur should have enter into solution, this is known because there will be no strong odor of Sulphur indicating
that much of it is no longer in a free state because it has combined with the Sulphite.
Some of it may be seen although in the solution as a spongeous yellow residue. At the end of about 2 hours at boiling
point; If necessary, add a further 10 - 20 grams of Sulphite to dissolve most of the sulphur residue if any is refusing to
dissolve. Continue to heat for another 15 - 30 minutes or until the water volume has condensed to 500 ml, If at the end of
this time there is any sulphur residue, it does not matter, just filter it off with paper or cloth after cooling.
Condensed to 500 ml, this solution will have a 30 % hypo concentration, it “clears” high speed negative film in less than 2
minutes. ( but should be left there not less than 10 min) Note, if this salt is condensed in a pan, it can be crystallized
to a “penta” hydrate, or if condensed until a dry waterless powder is obtained it will be the type known as “anhydrous”
which is not
really stable, it will absorb quickly 5 molecules of water from the air until it becomes finally a “penta” hydrate. These
are very large colorless crystals, with great tendency to absorb humidity from the air.
F 5 Hardening Fixing Bath
with homemade thiosulphate as given.
Made in 2 Parts for Long Keeping.
Part A: Stock Hardener Mix in the order given
Water at around 50 - 60 c ( 125 f + ).... 600 ml
Sodium Sulphite (anhydrous) ....75 gms
Acetic Acid glacial (= about 90 % +) ....13 ml
(or 28 % made by diluting glacial 3:8) ....235 ml
Boric Acid (crystals) ...37.5 gms
Potassium Alum ....75 “
Add cold water to a final Volume of ...1000 ml
Part B: 30 % home made Sodium Thiosulphate Solution
For Use: Stock Hardener A: 1 Part
30% hypo home made solution B: 4 Parts.
Add little by little the stock hardener A to 4 parts of the 30 % “ home made “ Hypo
solution prepared as already given. Or use any other 30 % hypo solution made by dissolving 300 grams of the salt in 1000 ml
of water. Fixing times remain the same.
 Fixing
Capacity of F 5 on Hand Coated Material
Fixing
Capacity of F 5 on Hand Coated Material
is about 1/3 of that given for “Machine coated”
paper and films which have a very “ thin” and above all a “uniform” emulsion layer,
furthermore these are produced on “non absorbent” substrates.
Hand coating produces layers of uneven thickness.
Thicker parts require longer fixing times and exhaust the hypo much faster than the thinner ones.
Paper absorbency is another factor which robs available hypo and requires longer washing.
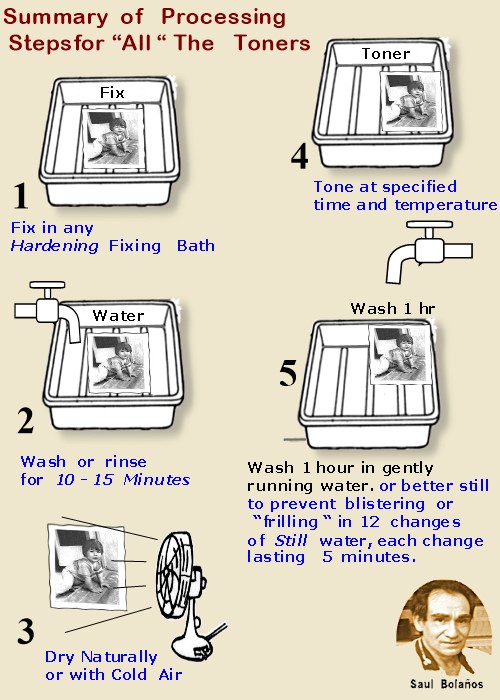 Direct Sepia Toners
Black & White pictures have a particular beauty but they do not really come “alive” until they are Sepia Toned.
Toning imparts at the same time “Archival Permanency“. Silver Bromide emulsions furnish rich sepias, but even richer are
Chloride and Cloro-bromide emulsions like the ones given in this book.
Toner 406 is based on a typical very old toner version used in the 1800’s which I have improved
greatly.
Toners 407 and 220 are my own
inventions. They all yield “Permanent” pictures.
When preparing these, all of them must turn “milky” in order to work. Clouding of the solution indicates that the sulphur
has been precipitated out of the clear solution and it will act on the silver print toning it. To prevent “frilling“ or
blistering;
the works must be processed using a hardening stop bath or hardening fixer. If it is known that they will be toned; Washing
can be minimized to only 10-15 minutes after fixing.
Double Tones
occur with uneven emulsion
layers, or are due to insufficient washing after fixing, or with prints processed too long ago on which time has hardened
its gelatine layer. Double Tones are avoided by good agitation during the first 2 minutes of toning. To minimize the risk
of “frilling” the prints after processing must be first dried before toning (this act hardens the gelatine) and are later
immersed in the toning baths in a “dry” state or previously soaked in water.
Follow particular direction given for each toner. For even toning, ( in all the Toners) old prints may require a
pre-soaking of 1-5 min. in cold water previous to toning. Print image with about 10 % more opacity to compensate for
density loss in toner. Tone in a well ventilated place and far away from Photo material (sulphur gases = fog )
TONER 406
Sodium Thiosulphate
pentahydrate................15 gm
Dissolve in hot boiling water.........................100 ml
add to the hot water: Potassium Alum .......... .5 gm
Boil for 2 minutes until sol turns milky
and add slowly in 1 ml portions with
agitation: 0.5 % solution of Silver Nitrate...... 10 ml
To tone 100 % more rapid: glacial acetic acid.. 3 ml
Do not filter.
Directions:
For preparing different quantities keep same proportions of reactants. For use: Heat Toner and
maintain it at 50c. Heat inside glass or
stainless steel pot and immerse print either dry or previously soaked in cold water for 1-2 min. Agitate continuously for
first 2 minutes, and often afterwards until the shadows on the middles tones have turned sepia.
With fresh baths this occurs in 5 - 10 min. With old: 10 - 20 min. At the end of toning, to avoid blistering, do
not “shock“ the gelatine on the print by sudden immersion on cold water. Place it first in water above 25c for a few
minutes and Wash afterwards for at least 3o min in cold water, During this time, with a wet cotton ball.
clean any Sulphur brought over from the bath and deposited on the picture’s surface. Re-activate Toning power by
replenishing with fresh toner. From time to time, to compensate for water loss during heating, do this: add water to the
toner in order to keep its solution at a constant volume. mark the level of original toner volume, on bottle where toner is
stored.
 Replenisher:
Long toning times as well as “Cold Sepia Tones” and “frilling” means the toner in use must be replenished with part of the
“fresh” unused toner.
The Potassium Alum (gelatine hardener) is subtracted from the bath during use, Toning rate is also reduced as acetic acid
is lost by evaporation. Tone density is also lost as the Hypo is exported embedded in the print.
Toner Life: it can be used over and over again for more than 1 year. It turns black and
thicken with age, but it does not matter. Not necessary to filter it.
The Silver Nitrate in the formula, is added very diluted (0.5%) otherwise it will be sequestered by the Sulphur (forming
Silver Sulphide) without the silver nitrate, toning takes extremely long & print density suffers. It is bleached.
Direct Sepia Toner 407
It was desired to formulate a toner that could be sent via air mail in a “dry state“ and in one “single package“, that is
without liquids, or corrosive acids like HCL or Sulphuric. The invention was fulfilled in the following toner, which uses
Tartaric Acid as the Sulphur precipitant for toning. 10 % Tartaric acid solutions are stable for at least 2 years. 20 %
Hypo sols are best used before 6 months. Advantages of 407 are: No Silver or Potassium Alum No heating, Toner is used at Room Temp.
Sodium Thiosulphate Pentahydrate..........4 grams
Tartaric Acid ...............................................2 grams
The above are weighted out and packed dried.
The mix keeps well “sealed “ inside “air proof ” packages.
Right before use they are dissolved in:
Cold Water ................................................. 100 ml
Directions:
As soon after mixing, wait until solution turns milky. (in about 1-10
min) Tone at room temperature immediately, toner has a useful life of only 1 hour. Immerse the print “Dried” with frequent
agitation for first 2 min. Middle tones begin to tone in about 15 min ( at 20 -25c) in 25 -30 min. time, toning is
completed. Wash print after, cleaning any Sulphur deposited on its surface.
Useful Life: One mixed Discard toner even if not used. Tone in well ventilated places,
Print image opacities about 10% darker than normal to compensate for slight bleaching action. Avoid breathing sulphurous
acid gases coming from Toner.
Notes:
1. Reducing quantity of Tartaric acid to only half, in formula above; -toning time is much prolonged and gel softens
because lack of Potassium Alum.
2. Toner 407 could be prepared from
aqueous solutions of hypo and Acid; for example:
20 % Hypo Solution:.................20 ml
Cold Water: ............................ 60 ml
10 % Tartaric Acid Sol:...........20 ml.
Use immediately after mixing as soon as it turns milky.
Direct Sepia Toner 220
Necessity is the mother of invention. Often, Sodium Thiosulphate could not be obtained in Costa Rica, where my Research
Labs were founded, and there was no time or space to make this salt. A way was found in using commercial Photo Fixers which
were most of the time available. Advantages of 220 Toner:
1. no frilling or blistering during washing, toner hardens the gel.
2. no temperature shocks.
3. formol can be easily obtained every where.
4. commercial fixing solution of any kind can be used, hardening or plain fixers, F 5 or
a plain 20 - 30 % hypo sol.
5. relatively long useful life. 6. Almost no bleaching of the opacities of original
silver image.
7. rapid toning rate at 40c.( 5-10 m with fresh toner )
8. does not attack the metal in pictures made on stainless steel spoons for example.
9. Almost odorless.
10. No need to add Silver Nitrate to impart toning capacity.
Sepia Toner 220
Commercial fixer normal solution .............100 ml
5 % Potassium Alum solution.................... 100 ml
Cold water .................................................. 100 ml
10 % Formalin................................ ............ 10 ml
10 % Formalin: = “Formic Aldehyde“ solution prepared by diluting the commercial 40% solution with 3
parts of water, Vapors of concentrated “stock” solution are “ Toxic” and irritating and
can cause headaches. Toner has so Little formalin that it is almost odorless. Nevertheless, Do not breath vapors. Use in a
very well ventilated place
 Directions:
immerse the Silver Image “Dried”. When Freshly prepared. At 25 c room temp; toner turns milky in about 15 min, heated to 40
/ 45 c tones in 5 -10 min, gel feels very hard even after 30 min of washing time in cold water without any precautions.
No double tones if agitated frequently during toning. To keep toning power replenish with fresh unused toning bath and also
add water from time to time as given for toner 406.
220 Toner has a useful life of 2 weeks maximum, after 4 weeks old; toning rate is much
slower and gel is dangerously softened at 40c. even if toner has never been used and bottle has been kept well capped It
looses its hardening power. It may be replaced then with a fresh solution. To avoid excessive swelling of the gelatin; Dry
Recently Processed Pictures before immersing in the 220 Bath. Arrest toning when middle tones have turned brown.
Note that the progress of toning goes on for a while even in the washing water. At 50c, toning is 100 % more rapid than At
40 c. At 75 c, It is effected in less than 2 minutes, but the gelatine may not stand it.
Antiseptic and fungicides To Prevent
Mould on Liquid ON “Uncoated“ Emulsions
Antiseptic # 1 Salicylic Acid
Prepare a 10 % alcoholic solution of Salicylic Acid
Salicylic Acid.............................. 10 gms
ethyl alcohol............................... 100 ml
Solutions keeps indefinitely.
Add it to the liquid emulsion melted at 40- 45c.
Dosage:
3 ml x every 100 ml of Liquid Emulsion.To prevent
gelatin degradation. Salicylic Acid may be added to liquid gelatin emulsions that have to be kept in
“uncoated“ liquid form for a few weeks; It may be added also when the coated emulsion can not be rapidly dried, as
in very humid weather where it would take coated material more than 12 hours to dry spontaneously.
Note that emulsion coatings that remain humid for too long on its support and are not dried in less than 36 hours will
suffer. Speed may change, Fog may appear, spots may develop and contrast will be reduced. For
quality work make sure the coated material dries in less than 12 hours. Here is one more reason why it is better to
apply several thin coats on different emulsion coating sessions and drying in between each coat, than 1 single heavy coat
that will take too long to dry and worse still; It may never be completely Fixed by the Thiosulphate, A condition Fatal For
Permanency.
Above dosage will keep emulsion in good condition at room temperature (20-27c) without refrigeration for at least 30 days.
(in 40 days mould may appear).
Under refrigeration (5-10c) that dosage will conserve it about 4-6 months without
fungi, spores, or mould.
Note Salicylic Acid in great excess (or any other acid) will hydrolyze the gelatin (gelatin solutions loose their setting
power) if kept at room temperature too long.
(but not under refrigeration) Too Excessive salicylic acid concentration may lower contrast a little on liquid emulsions
formulated with "hard" gelatins because the drop on the emulsion’s PH and the gelatin emulsion hardness may
hinder the developer solution from penetrating deeply into the emulsion layer.
Antiseptic # 2 Ethyl Alcohol
Emulsions with a 30% Ethyl Alcohol Concentration will not biodegrade and are RAPID DRYING. add the alcohol to every 100 ml
of liquid gelatine emulsion melted at 35-40c,
Condensed Liquid Emulsion............ ........... 70 ml
Ethyl Alcohol (80 -100 %) hot 45 - 55c ... 30 ml
Glacial Acetic Acid...........................0.20 - 0.40 ml
HOW TO CONDENSE LIQUID EMULSIONS
Condense liquid emulsion in an evaporating Dish before adding the
Alcohol. With alcohol emulsion spreads extraordinarily easy causing no bubbles when coating. THE Acetic Acid in the Alcohol
in formula ABOVE helps to re-dissolve gelatin in emulsion in case it precipitates during addition. Before condensing
emulsion to add the Alcohol optimum ripening time must of course be known. Now assuming we are making Unwashed
Cloro-Bromide emulsion # 2 which has a ripening time at 55 c of 2 hours and a final volume of 500 ml ( for a 8 % gel conc.
/ see formula),
 In such case
during the progress of ripening at 55c, no lid is placed on emulsion vessel to cause it to condense. ( stirring often will
speed condensation) When condensed in an evaporating dish (see figure) to a volume of 350 ml, the lid is placed on emulsion
vessel or emulsion is transferred to a glass jar.
In such case
during the progress of ripening at 55c, no lid is placed on emulsion vessel to cause it to condense. ( stirring often will
speed condensation) When condensed in an evaporating dish (see figure) to a volume of 350 ml, the lid is placed on emulsion
vessel or emulsion is transferred to a glass jar.
Emulsion is now submitted to the remaining normal ripening time with lid on jar to prevent Further condensation. At the end
of the ripening time, Sol below is introduced in 1 single solution:
Ethyl Alcohol ( 80 - 100 % ) ............1 50 ml
Glacial Acetic Acid........................ 1 - 2 ml
If not added little by little in portions of about 1-5 ml at a time, (with vigorous agitation/ wire beater is beater) the
gelatin will precipitate and it will be difficult to re-dissolve even with persistent agitation.
To avoid this precipitation, the alcohol must be heated to 45-60c, before adding it to the emulsion which must be around
the same temp.(final volumen should be: 500 ml)
Unwashed Emulsions have Antiseptics
This was found at my Research Labs: Unwashed Emulsions like the Chlorides and Chloro- Bromides given in this book, when
kept in liquid form in uncoated condition at room temp (26 c or below) Do not develop fungus or show signs of putrefaction
even after many weeks.
When “coated“ and kept inside large chambers without any protection exposed to humidity and contaminants from the air;
These unwashed emulsions showed no biodegradation of gelatine whatsoever even after
many weeks. It follows then, that the soluble Potassium or Sodium Nitrates left on the
emulsion (due to lack of washing) exert a powerful antiseptic and anti-mould
action.
CONTACT

COSTA RICA © 2025, saul
bolaños
CAFEDESAUL@GMAIL.COM